

The fastest way to move all files from one Google Drive account to another is a server-side cloud-to-cloud transfer, not a manual download-and-re-upload. Server-side means the files never touch your device: MultCloud (or a similar cloud-to-cloud tool) authenticates both Drives, moves the data between them directly, and completes while you close the browser. Three steps: create a MultCloud account, authorize both Google Drives, configure a Cloud Transfer task from source to destination. Common scenarios: graduation (before the .edu Workspace expires), job change (before institutional access is revoked), separating work and personal accounts, or backing up between two personal Drives.
When you actually need this
Three real reasons this comes up:
Graduation or academic transition. Universities deactivate or downscale .edu Workspace accounts after graduation. To avoid losing coursework, research, and portfolios, move files to a personal account before the deadline.
Job change. Moving from one company to another means transferring personal assets, templates, and non-proprietary reference materials to a personal or new work account before institutional access is revoked.
Separating work and personal. Keeping work files on a personal account (or vice versa) risks security exposure and clutter. Migrating files ensures clean boundaries.
Why manual download-and-re-upload is a bad idea for large libraries
The first attempt for most users is downloading everything from the source Drive to a laptop, then uploading it to the destination. Fine for a folder of ten documents. Miserable for a decade of files. The problems:
- Time. Bandwidth-bound both ways. Terabyte libraries take days.
- Local disk space. You need room for the full download.
- Interruptions. A dropped connection restarts the transfer.
- File type conversions. Google Docs, Sheets, and Slides do not preserve cleanly through the download-upload path unless you use specific export formats.
- Version history loss. The upload creates new files, so revision history from the source is lost.
Google Takeout is the official alternative and has similar problems: it downloads everything as an archive, then you upload manually.
The three steps for server-side transfer
Before you start: check that your target Google Drive has enough free storage for the incoming files. If the destination is close to full, delete unneeded files first.
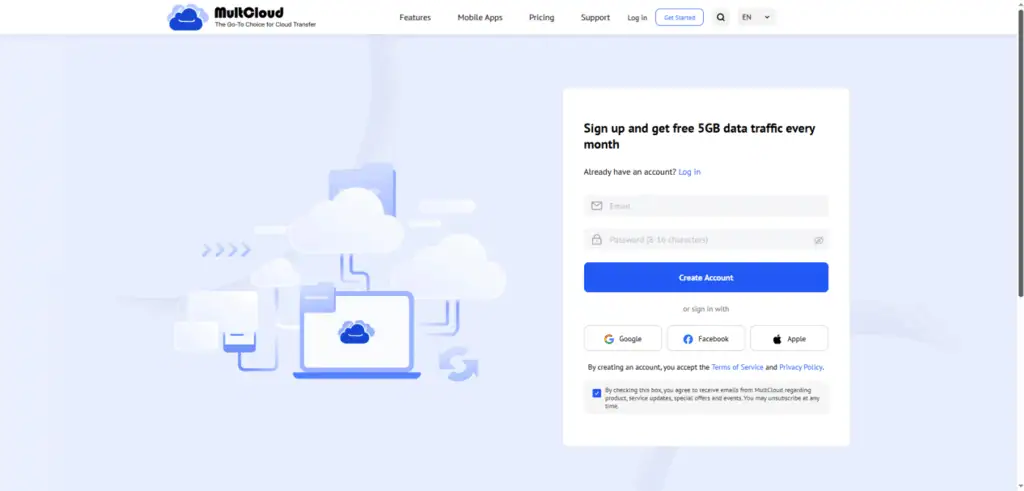
Step 1: create a MultCloud account
Visit the MultCloud site and register a free account. Email signup or Google authentication.
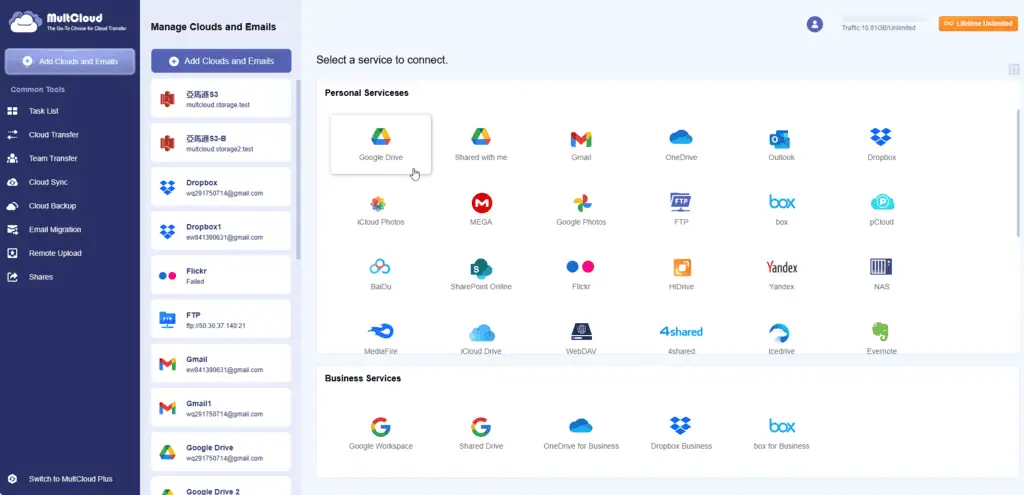
Step 2: add both Google Drive accounts
Click Add Clouds and Emails on the left menu. Select Google Drive and follow the prompts to grant access to your source Drive. Repeat for the destination Drive. Rename the connections for clarity (“Drive-Old” and “Drive-New”) so you do not mix them up in the transfer task.
Step 3: configure the Cloud Transfer task
Click Cloud Transfer in the sidebar. Set the source Google Drive (or specific folders inside it) in the FROM box. Set the destination Google Drive folder in the TO box. Click Transfer Now to start.
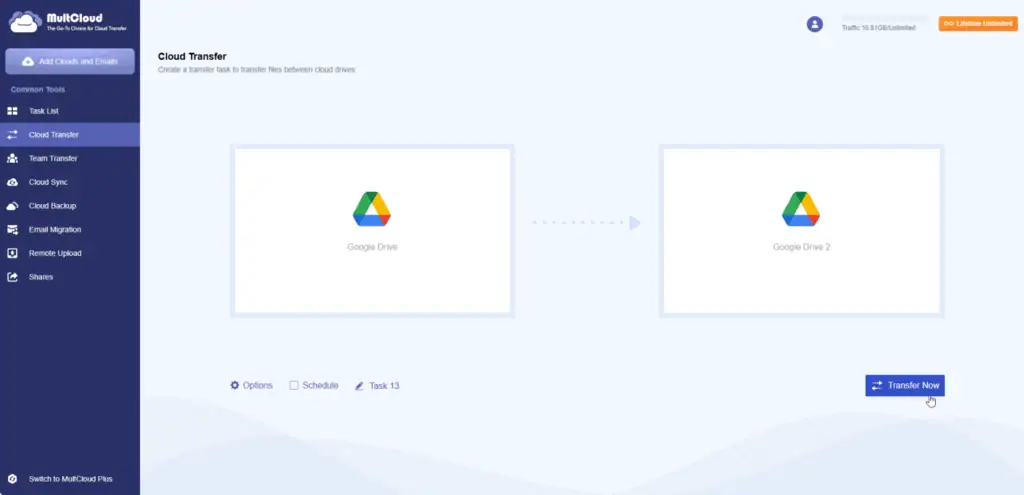
The transfer runs on MultCloud’s cloud servers. Close your browser, turn off your computer, walk away. The task completes in the background and emails you when it is done.
Features worth using during the transfer
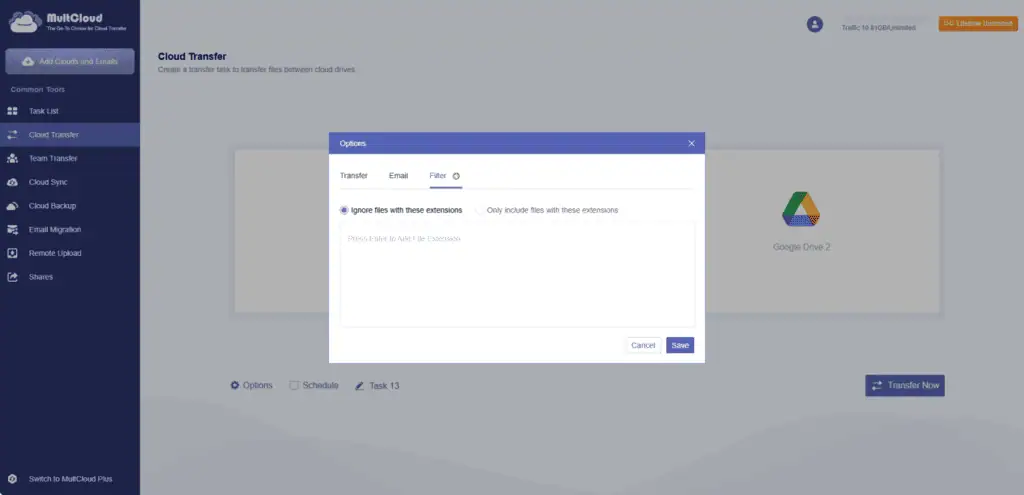
File filters. Under Options → Filter, set rules to include or exclude files by extension. Skip temporary system files or large video archives if you only want documents.
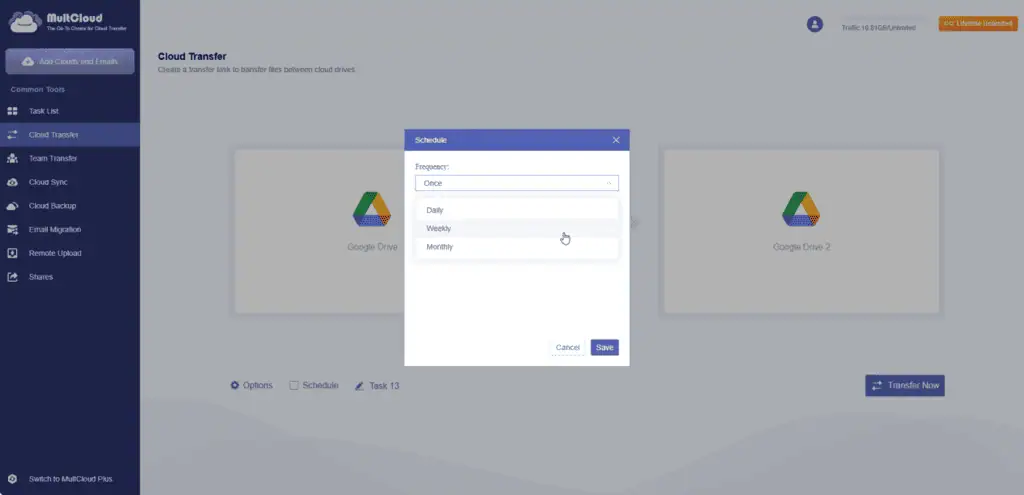
Scheduled transfers. Run the migration at a fixed frequency (daily, weekly, monthly) to keep two Drives in sync rather than as a one-off.
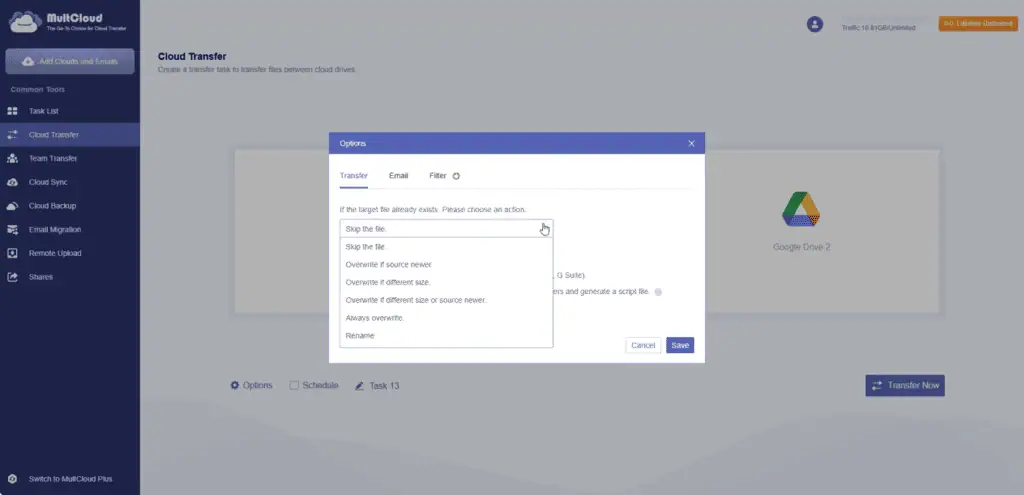
Conflict resolution. When a target file already exists, six handling strategies:
- Skip the file
- Overwrite if source is newer
- Overwrite if different size
- Overwrite if different size or source is newer
- Always overwrite
- Rename
Security and access revocation
MultCloud uses OAuth 2.0 authorization, which means it never stores your Google account password. All data is protected using 256-bit AES encryption during the migration. Once your transfer is complete, revoke MultCloud’s access via your Google Account → Security → Third-party apps whenever you want. That is the standard OAuth revocation flow and it takes about 20 seconds.
Two general points worth naming for any cloud-to-cloud transfer tool:
- Grant only the scopes you need. Google Drive read access on the source, read-write on the destination.
- Revoke access after the transfer completes. Not a criticism of the tool. Just good hygiene. Any OAuth token that outlives its purpose is a credential you no longer need active.
Manual vs cloud-to-cloud, at a glance
| Method | Time | Local disk needed | Handles interruptions | Runs in background |
|---|---|---|---|---|
| Download + re-upload | Slow | Full library size | No (manual restart) | No |
| Google Takeout | Slow | Full archive size | Partial | No |
| Cloud-to-cloud (MultCloud) | Fast | None | Yes (auto-resume) | Yes |
For most libraries above 10 GB, the cloud-to-cloud method saves hours to days.
When to just use Takeout instead
Two cases where Google Takeout is the right choice despite being slower:
You want a local archive as well as a Drive migration. Takeout gives you a local zip file you can archive independently of either Google account.
You are leaving Google entirely. Takeout downloads the whole thing in one archive. If you are not going to another cloud, you do not need cloud-to-cloud.
For everything else, server-side transfer is faster, cleaner, and does not tie up your device.
Once the transfer is done, audit what came across. Google Docs, Sheets, and Slides transfer with revision history preserved. Photos in Drive stay as photos. Shared files remain shared with their original permissions unless you change them. If the source account is about to be deleted, download a Takeout archive as a backup as well before you close the account, on the principle that redundancy costs nothing.
For adjacent workflows I have covered, best AI tools lists the vetted picks for productivity software that pairs with Drive.
Related Posts

78% of companies say they use AI. Only 21% redesigned a workflow. Here are the sourced AI adoption statistics and the ho...

A free, cited AI glossary covering 264 artificial intelligence, machine learning, and generative AI terms - plain-Englis...

I pulled 239 threads across 7 subreddits. Marketers use AI daily and hate the products. Here is what the highest-voted t...
The Chrome and Firefox extension I built to save, tag, version, and export AI prompts locally. Free. No account. No clou...

I ran a 26-feed pipeline for 34 days and logged 2,234 AI stories. Here are the sources worth your time by output, and 3 ...